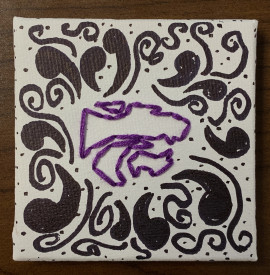
Embroidered Canvas
Question
Embroidered Canvas
Answer
Take your decorating to the next level with this DIY embroidered canvas! Create a personalized design to decorate your walls or give to a friend as a thoughtful gift!
- Canvas
- Pencil or printer for design
- Embroidery needle
- Embroidery thread
- Optional: permanent marker, paint or whatever you'd like to use to decorate the background
Directions:
Optional: If you want your painted or drawn background to be under the embroidery, do that now. Otherwise, background elements can be added after the embroidery.
Step 1: Lightly pencil a design on your canvas or print out a design and tape it to canvas. Note: make sure the wooden frame on the back of the canvas isn’t too thick since that will limit the space to embroider.
Step 2: Using your needle, trace the design by poking holes through the canvas approximately 1cm apart. (If you are using a small canvas or creating an intricate design, you may want your holes to be closer together.)
Step 3: If you taped a printed design to your canvas, remove it at this time.
Step 4: Knot the embroidery thread and use the needle to bring it back to front through the first hole. Continue embroidering with the backstitch method, using the holes as a guide.
Step 4: Once design is complete, tie a knot in the thread to secure design. If you want, tape the knot and any excess thread to the back of the canvas to keep the stitches tight.
Step 5: If you didn't do so before embroidering, use a marker, paint or other art supplies to add details to canvas.


